
I have found myself facing a challenge I once struggled with and ultimately lost several years ago. This time it is a corset from 1913.
Before my wedding I needed exactly this type of corset for my bridal gown. Unfortunately after several unsuccessful attempts at sewing it using historical patterns from period fashion magazines I gave up. Time was running out and I still had the wedding dress to finish. In the end I chose a slightly older ready made corset. Ironically it turned out to be even better suited than the one I had been trying to construct.
Today I am working on a dress dated to 1912 and this time there is no room for compromise. I have to be consistent. The undergarments must follow the beauty ideals of the period and remain fully in line with historical standards.
So once again everything begins at the very foundation. With the corset.
This time I decided to use a ready made pattern by Truly Victorian Link
According to the designers the pattern is based on an original corset pattern found in a 1913 issue of De Gracieuse, a Dutch fashion magazine comparable to Harper’s Bazaar.
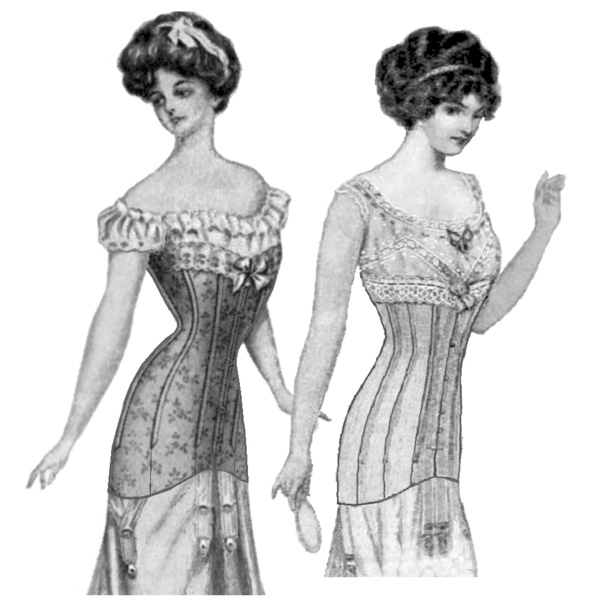
Their Late Edwardian Corset is designed to be worn under dresses from the years 1909 to 1916. It creates the long smooth hip line required for the slim skirts characteristic of this period.
The corset comes in two bust height variations. The low bust version ends just below the bust and is suitable for the years 1912 to 1916. The high bust version is ideal for the years 1909 to 1912 and for figures that require fuller bust support.
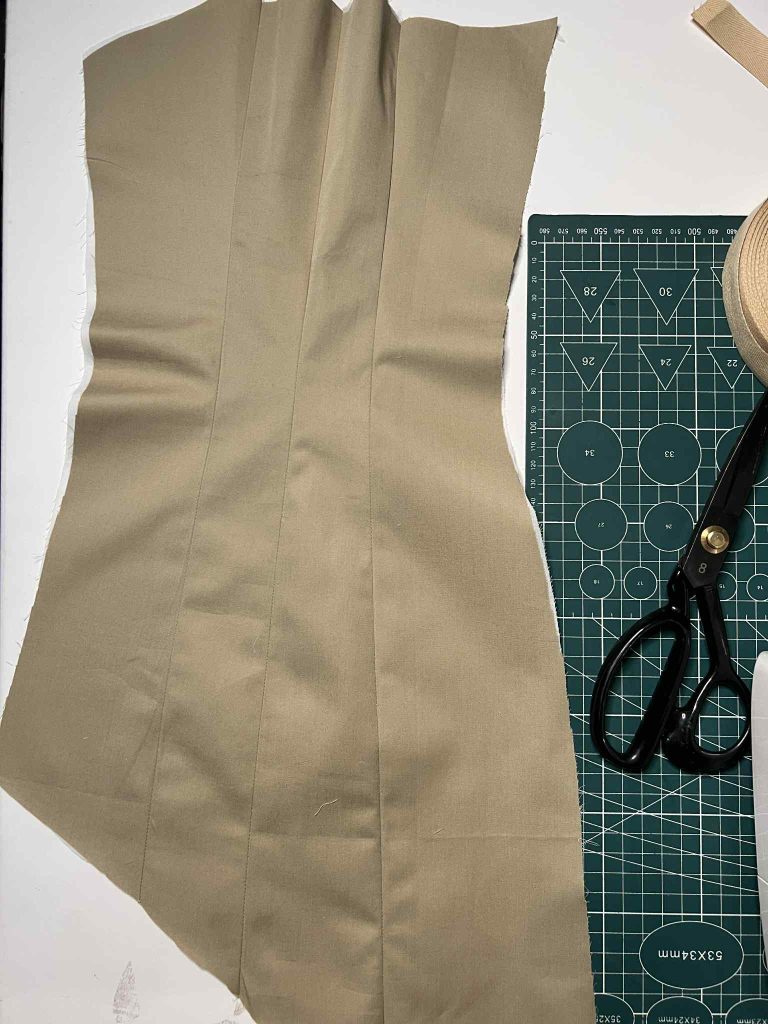
I took my measurements very precisely and according to the size chart I fell between sizes E and F. Following the instructions I chose the smaller size, E, and cut out all the pattern pieces.
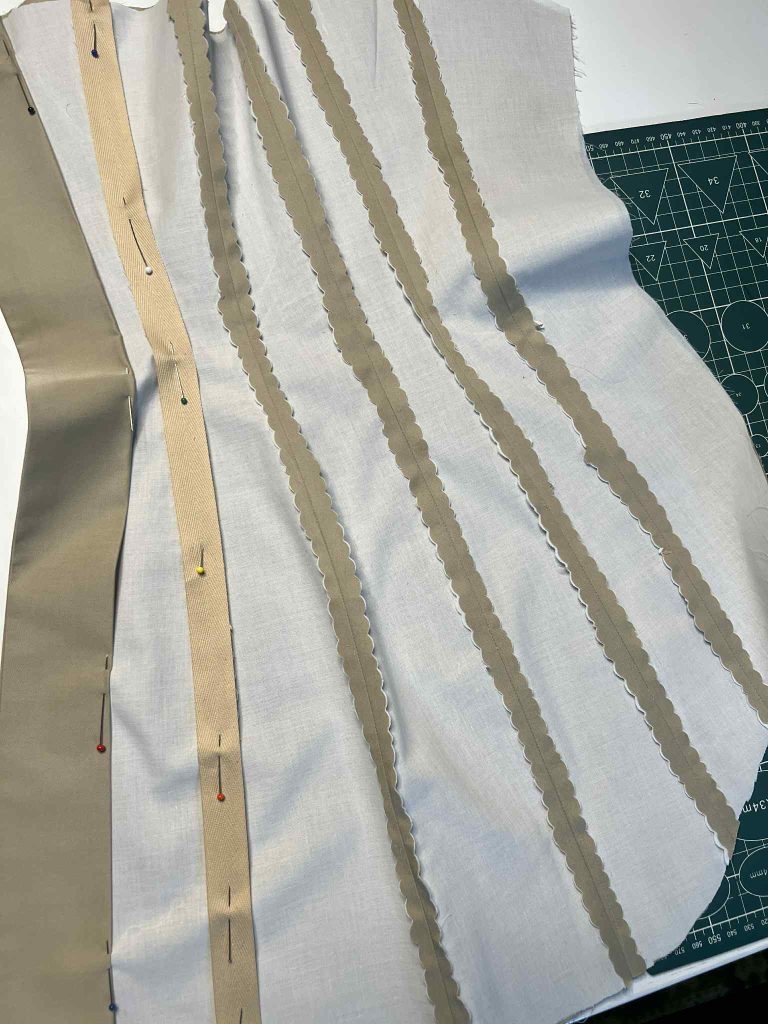
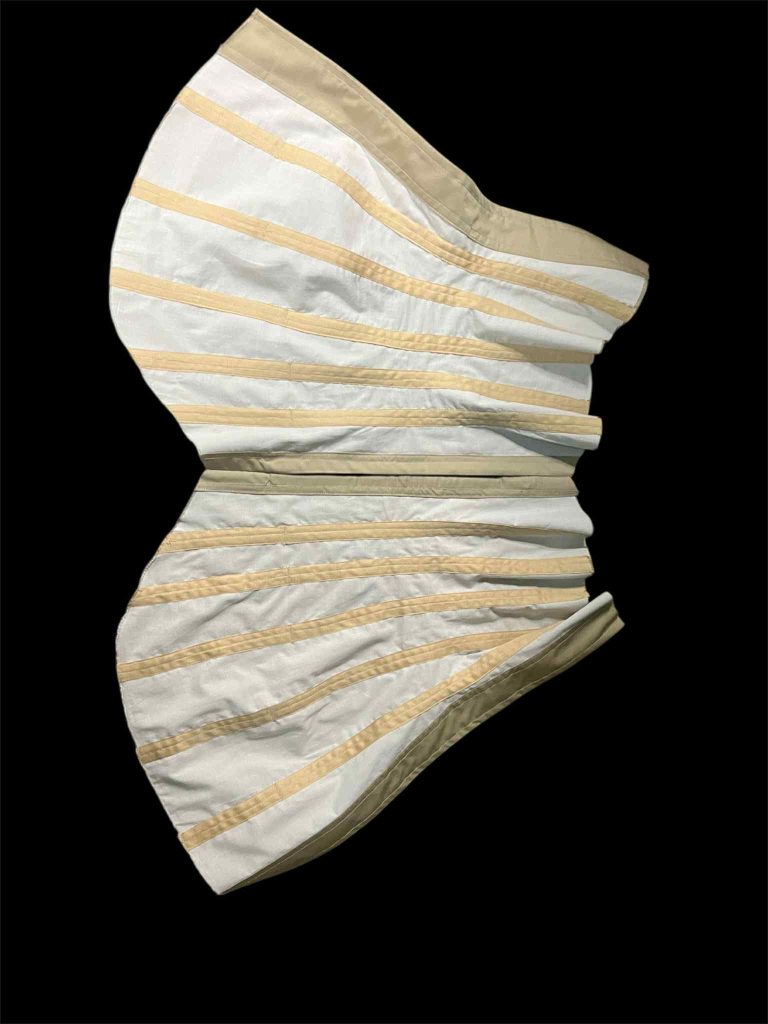
This was my first deviation from the original design. I decided to add a lining even though the corset was originally intended to be unlined. I chose a very fine lightweight cotton muslin.
A practical note from experience. In corsets of this type it is usually better to select a lining fabric with a similar weight to the outer fabric. Choosing a lighter fabric is not technically wrong but it can result in visible wrinkling, as happened in my finished corset. Many original museum corsets show similar wrinkling, so this is not a serious flaw.
Each assembled panel was pressed with the seams opened flat and then trimmed using pinking shears so the layers would lie more smoothly.
For the boning channels I chose a 2.5 cm wide cotton tape. Here comes a small digression. I followed the instructions closely but ran out of waist reinforcing tape. When sewing my next corset I will definitely choose a slightly heavier coutil, a sturdier lining and I will include a waist stay.
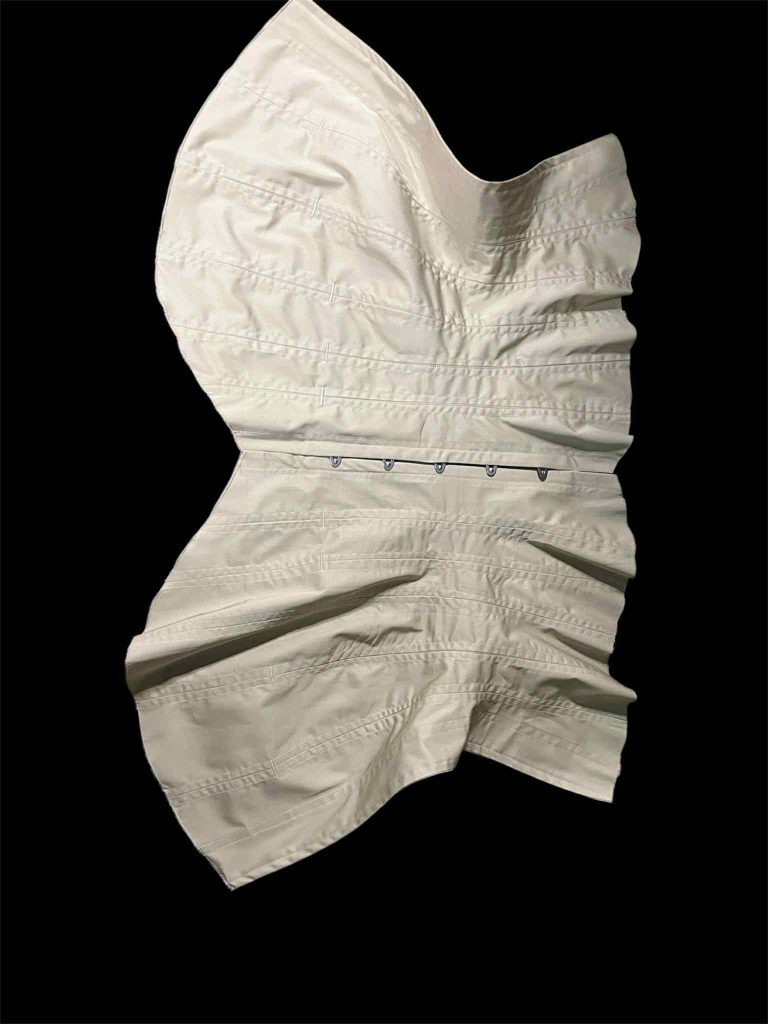
The purpose of the waist tape is not to allow for greater waist reduction but to distribute tension more evenly and significantly extend the lifespan of the corset. This feature may well have been not present in the original but it became clear to me during the first fitting. For safety I reinforced the seams in the waist area once more
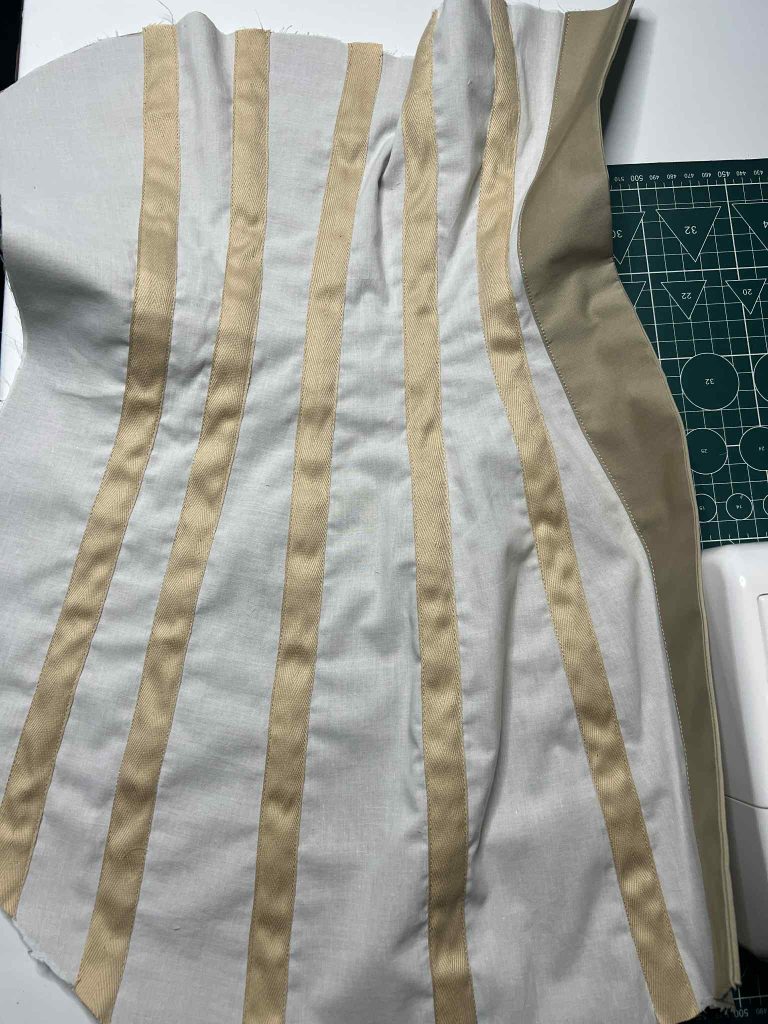
This is how everything began to look after the boning channel tapes were sewn in. Remember that the bones are not inserted to the full length. Otherwise sitting would not be possible. The pattern clearly marks the points up to which the bones should be inserted and where they must end.
I secured the lower ends of the boning channels on the sewing machine using a very dense zigzag stitch similar to a buttonhole stitch. Of course this can also be done decoratively, for example with flossing, but simple stitched finishes appear far more frequently in original surviving corsets.
The next step involved inserting the busk. I chose a simple straight busk measuring 25 cm. I left space at both the top and the bottom, since a busk never reaches the full length of the corset and I also did not want it to be that long as it is impractical. If you look at period advertisements, the busk never extended all the way to the edges of the corset.
A practical tip from my own experience. For the busk side with the studs, use an awl to open the holes rather than cutting them out. A cutter may look neater, but in this area the fabric is likely to wear out the fastest. Using an awl is much safer. The same applies to the lacing holes. Unfortunately a cutting tool can weaken the fabric in these areas because it cuts through the threads instead of separating them.
After inserting the busk I moved on to the bones. Instead of steel I chose synthetic whalebone from my supplies, which I definitely prefer. I placed flat steel bones only along the back lacing and used regular spiral steel bones in the front.
Remember to secure the edges of the bones with duct tape or special metal tips. Otherwise the bones will tear the fabric. The same applies to plastic bones. Here I can share my own trick: I gently singe the ends with a lighter so that they are always smooth and rounded.
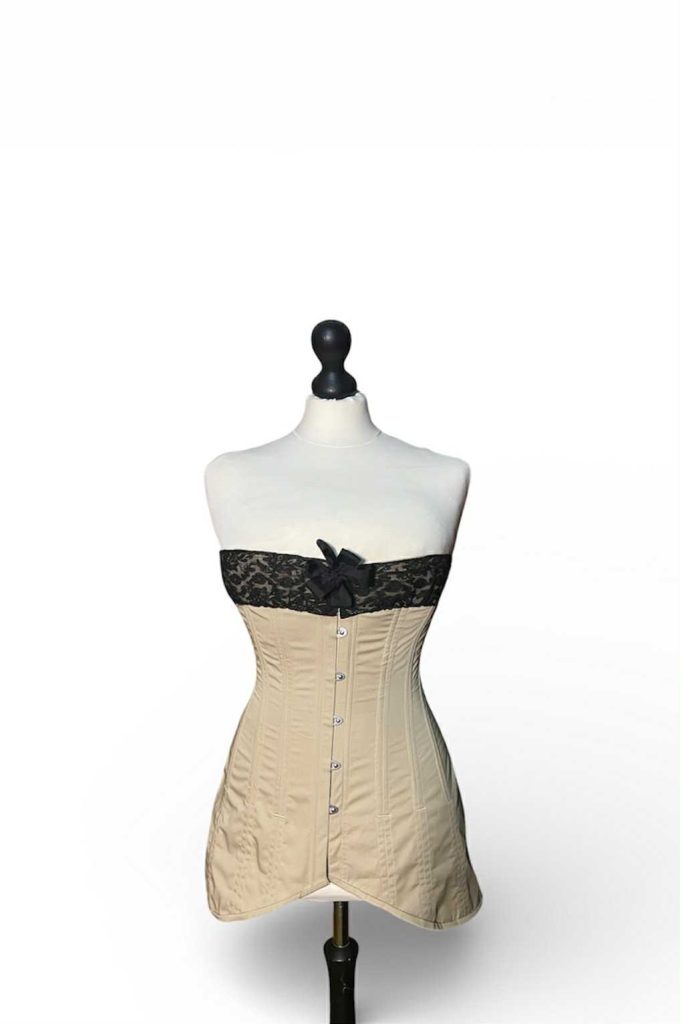
Altogether I inserted 18 bones. The corset turned out to be quite delicate, lightweight, and comfortable.
At this stage the corset did not yet look complete. I moved on to making the eyelets and sewing in the hooks for fastening at the top and bottom. I decided to embellish the corset with black lace and a silk bow under which an additional fastening is hidden.
And that is the finished corset. Considering that I made it from leftover pieces from other sewing projects, I think it turned out quite well.